Monday, December 10, 2012

Easy Street Week 3

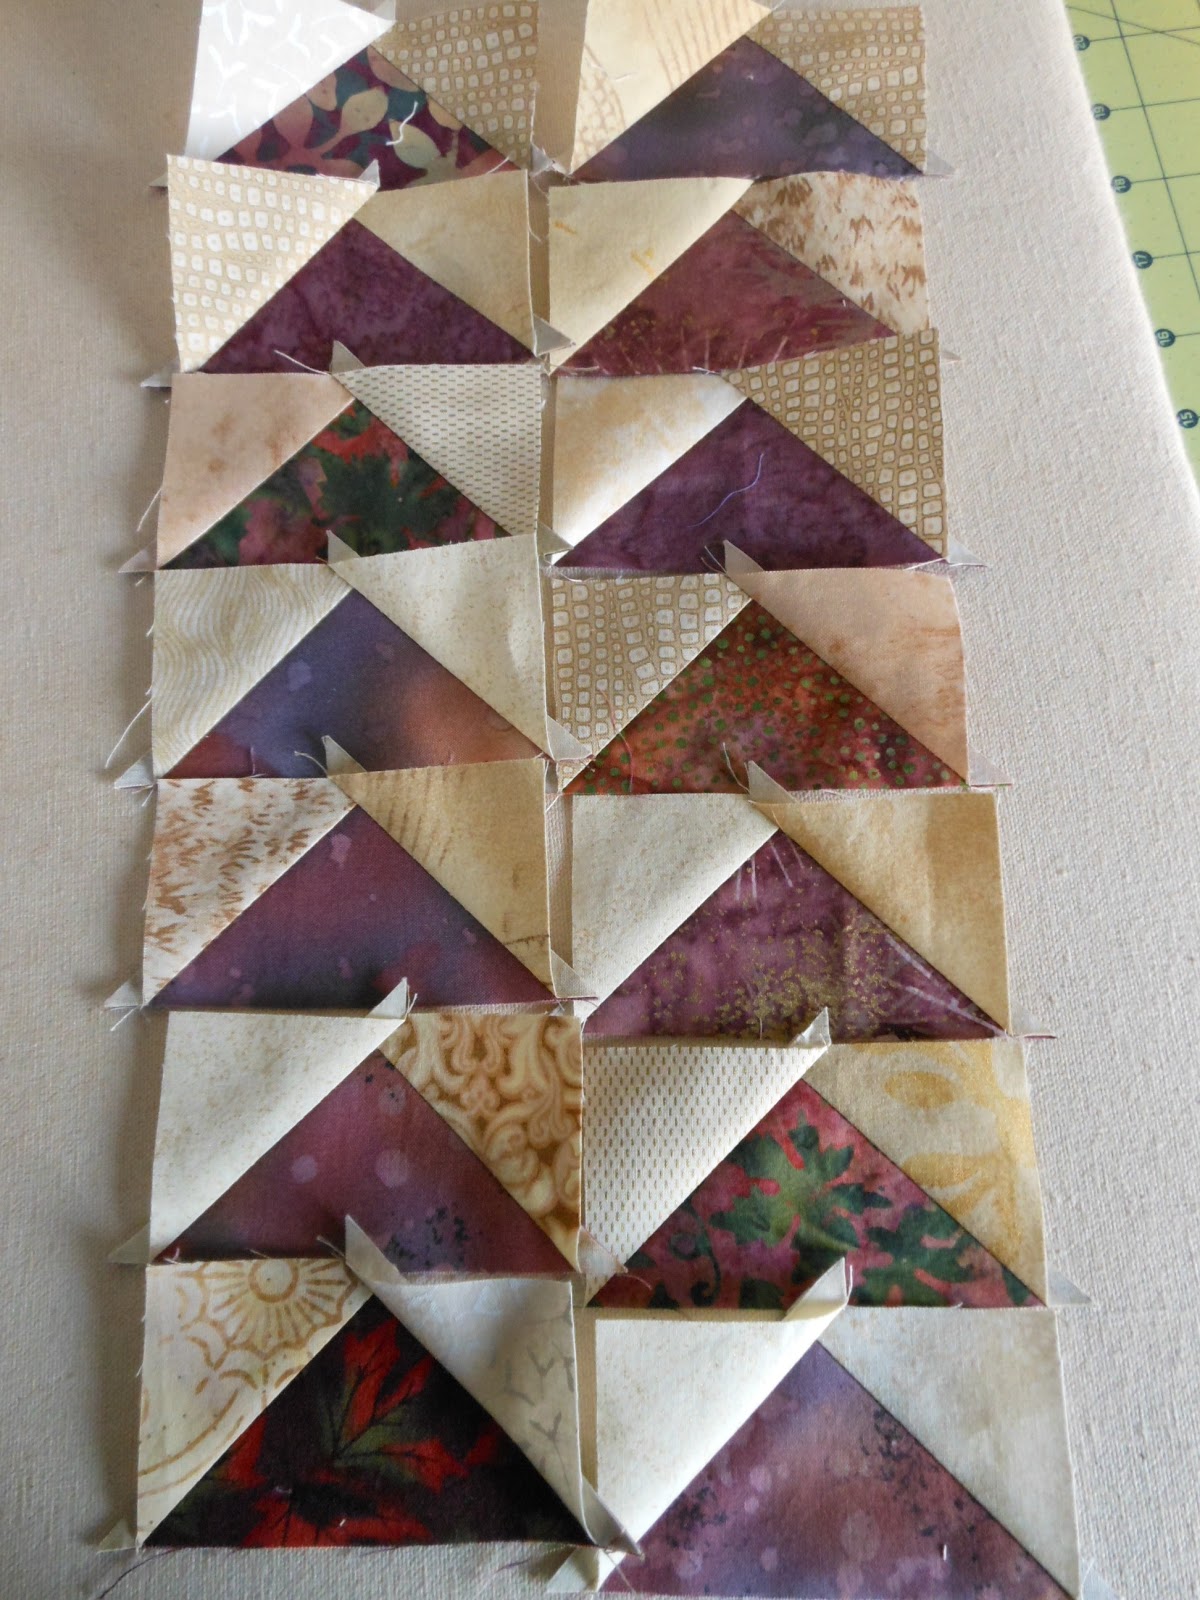
After my weekend of holiday frenzy, I did manage to finish the pieces for week 3 of Bonnie Hunter's Easy Street mystery. I pulled out a bunch of dark, olivey greens, leaning more toward yellow than blue. I have been surprised at how many fabrics I have that blend these two colors. I tend to think that fabric choices are like Garanimals, though - these fabrics are all marked with a little A for Angelina, so they all go together.
There hasn't been a lot of sun in this part of the world since Friday, so the photos aren't naturally lit, but they get the idea across.

Weeks 1 and 2 with green fabrics
I didn't use the Companion Angle ruler (because I don't have it) so I did these the old-fashioned way. Only thing is, I cut every one of the 128 tiny background triangles the wrong size. These little squares finish at 3", but I am more accustomed to working in 2" units than 1.5" units...sigh. Having to slice a half inch off every triangle slowed me down quite a bit, but at least I didn't have to start over and cut bigger pieces. The fabric waste irritated me, though. :( But they do look nice, and I like the green-purple combination very well indeed.
Third clue is complete!
By my calculations, we have now completed 45% of the units for this quilt. Huzzah!

Sunday, December 9, 2012

Holiday trimmings

I had meetings every single night this week. That caught up with me on Saturday, when I slept in and couldn't face the idea of leaving the house again. I actually forewent (is that a word?) a trip to the SAQA meeting in Guilford, which was the first time I could have gone all year. But wow, it was great to spend the weekend holed up in my creativity nook. My spouse mentioned that we didn't really have any Christmas wall hanging quilts, which surprised me because I feel like I have made a lot of them. Turns out I never finish them; they have all just been hanging out in the UFO bin. That defined my Saturday.

Back in June when we went to the Vermont Quilt Festival, I found a teensy weensy twister ruler that I couldn't resist. When I got back to Connecticut, I got right down to the business of sewing 2.5" squares together, then cutting them up again. My cute little tree has been all wrapped up in batting since then, wanting only a border. I did some scrounging in the closet and found a piece that was perfect, nice holiday jewel tones on a background that makes the whole thing look like brownish wood from a distance, with just a hint of gold for holiday glitz. I bordered, quilted, and bound this little sparkler in the early part of the day. I still need to attach a few teensy weensy jingle bells, which I'll just tie randomly over the tree; that will be a good task for Tuesday morning's piano lesson. After that, DONE: ready to hang!
I left the cutting mat visible for scale. These little pieces are only a quarter of a square inch.

Detail of background meander quilting, done with rayon thread.
After that, I pulled out my Baby it's Cold Outside embroidery piece and got brave with a new motif I saw in Angela Walters' most excellent book. I filled a few pages in my practice journal with this one before putting thread in the machine. It was tricky, and I could probably have benefited from a little more patience, but this was a little job so I got to it. Not too bad, although working around the embroidery in the center was a little challenging. You can see where the shapes got a little off scale, but overall I'm pleased with the look. I still need to slap a binding on this one, but that will be quick. I'm also planning to tie a few rhinestones onto the snowflakes in the embroidery (can you tell that holidays are very sparkly around here?). I would like to use this motif to quilt my autumn Rapid City, which has been pinned and waiting for two weeks, but I don't know if I'm confident enough in the motif to commit to a whole job.
Brrrrrrrrrrrr (from the "Waffletime" pattern, Atkinson Designs)

Here's another fun little holiday job that I threw together on Friday night at the midnight sewing extravaganza at Lisa's. I left it on the wall overnight, and my older son (who doesn't usually comment) noticed it and complimented it first thing on Saturday. I'll take it. My plan is to use a few decorative stitches to add some "icing" details to give the houses a gingerbread look, then some simple quilting to get it on the wall.
From the "Neighborhood" pattern (Modern Patchwork, Elizabeth Hartman). Love that Bumble!
This table runner has also been hiding in the batting bin waiting for my attention. I'll try to get to it this weekend; I'm planning simple straight line quilting like I did on the Pink Rink one (hey! I just noticed I never posted a "finished" photo for it!), but that is a more time-consuming process than I originally thought it would be!
From the "Roller Rink" pattern (Modern Patchwork, Elizabeth Hartman)
For those of you who wonder if I sleep, Yes! I slept until after 8:30 this morning...then got up and enjoyed the maple oatmeal scones that my ten-year-old had baked the night before! We had to talk him down from his plans to ALSO make a blueberry cobbler with custard sauce AND a German apple pancake. What a kid, huh?

Sunday, December 2, 2012

Mystery Geese

Back to Easy Street with Bonnie Hunter this weekend...this week's installation was to make 128 teeny flying geese, finishing at 1.5 x 3". That's a lot of little pieces to cut, even using Deb Tucker's Wing Clipper ruler.

I had to commit to one of the colors this time, so I chose dark, dusty brownish purples. For some reason, I have a lot of scrap chunks in this color. "Purple" is, in my opinion, a nearly meaningless descriptor; fabrics that are loosely defined as "purple" never seem to look good with other purples; red-violet and blue-violet are completely different beasts, and I wanted neither for this project. I made a few sample geese just to check the coordination, and the fabrics I had pulled out looked very nice with the light tan backgrounds.

The rows of teeny geese look fantastic all laid out next to each other.
These aren't trimmed down yet, but I wanted to take a few photos before the sun set so I could use natural light.

When I put a few of the four-patches next to the geese, it started to have kind of a warm, rich, wine-country feel:

In terms of color selection, I'm playing this project by ear (wait...my ear can't pick color...I'm not on some weird quilting acid trip). Let me try that again: I'm letting the process determine the colors, and at this point I have a Tuscan countryside color scheme in mind. I'm thinking the next (main) colors will have to be deep olivey green, and a very dark gold/rusty orange. I usually work in brighter, more vibrant color, but I'm already starting to fall in love with my mental vision of this emerging project.
Photo completely lifted from the website of Roberto Carli, a photographer I don''t know, but who takes amazingly beautiful pictures.

Newington Group Quilt blocks

I'm in charge of organizing the group quilt this year for the Newington Schoolhouse Quilters, and our blocks are due tomorrow. I anticipate that we'll have a very good response from our members, since this is such a quick block to assemble, and since people do seem eager to make two full-size quilts, one for a member to win and one to donate to our meeting site for their charitable fundraising. We're using a color variant of Elizabeth Hartman's Roller Rink pattern (I made a nifty pink one earlier this year). I can't wait to see this one go together. I made ten more blocks tonight:

Now I need to spend a few minutes putting together the sign-up sheet so our eager members can get these blocks assembled and off to be quilted. And I just now remembered that I need to make a pincushion (like this one) for our holiday exchange. I like this idea -- kudos to our new co-pres Tammy for arranging such a fun little thing!

Friday, November 30, 2012

Colorful pincushion

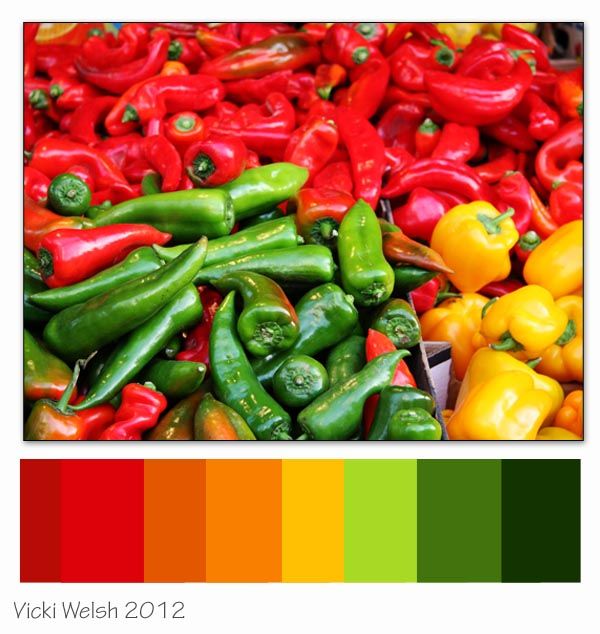
The photo for November's color palette challenge was wonderfully vibrant: 

...but, since it was essentially the same as the May colors (which I also loved, of course), and it came during the holiday/end-of-semester frenzy, my project was a modest one. I made a pincushion as a prototype for the pincushion exchange that Newington Schoolhouse Quilters is having on Monday evening. Cute little hand-sewn hexies!

Free Motion Spirals

It's the end of November, so this year's Free-Motion Challenge is coming to a close soon. I would like to express my deep gratitude to SewCalGal for organizing this wonderful project. I have been practicing for just under a full year, and what a difference it has made! I'm not winning any awards with my quilting, but I would classify myself as having confident intermediate skills. And even more importantly, I am not feeling intimidated by the prospect of trying new things; even quilting really large projects seems feasible now!

I love these spirals that Sarah Vedeler focused on in her tutorial. I have done a few spirals before, but having some guidance on how to shape them evenly was very helpful. I started by drawing a grid with the FriXion pen, then jumped in with a couple rows of one-inch spirals:
After a few rows of two-inch spirals, it started to get just a wee bit boring. I consider that a good sign in terms of skill development -- when the mind begins to wander, it means "muscle memory" is taking over and the process is less mentally taxing. When I'm working on a "real" (i.e., not just for practice) project, I combat this boredom by constantly mentally recalculating what percentage of the project I have finished ("Ooh, that's 2 rows finished, 30 to go...I'm 6% done already!...If I do this much every day, it will only take me XXX days to do the whole quilt!"). Seriously, that is what goes through my head.
 I filled up a 16" square, ending with some bigger spirals, and an oblong one to finish off the experiment...
 ...then I wrapped up with a motif from Angela Walters' new book. I really like this little grid filler. I have a quilt in the UFO bin right now that this would be perfect for:

Wednesday, November 28, 2012

Radical Experiment

So, for a while now, I have been wondering if it is possible to use my embroidery machine with a twin needle using cyan and magenta threads to get a 3D effect. Due to a serendipitous confluence of events -- specifically, the good folks at Urban Threads posted something on Facebook about 3D embroidery AND my machine happened to be hooked up at the exact same time -- this was the evening to try it.

Guess what? WIN!

I can't find my 3D glasses -- I know they're in the house somewhere -- so I'm using my kids' transparent plastic tangram shapes to get the 3D "Magic Eye" effect.

This is just some junk muslin that I hooped up, the design is a symbol font that I previously digitized as an outline with my 4D QuickFont software, stitched out with a 6mm twin needle using rayon threads in the closest I had to true cyan and magenta. Nothing special, nothing to keep...but the concept worked!! [Insert maniacal laughter here.]

I will definitely be doing some more of this...watch this space (if you dare).