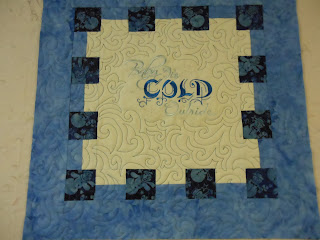
December's
free-motion quilting challenge was to work on border designs, based on the tutorial graciously provided by
Patsy Thompson. I printed about a dozen of the practice sheets that she provided and doodled all over them trying out different designs. Even my eight-year-old enjoyed this exercise, because he can use this technique to incorporate frames onto some of his drawings.
I spent the cold, grey morning working with a very heavy heart on what turned out to be quite a lovely piece, which I will turn into a pillow for our family room. I used a length of Moda Marbles that was hiding in the stash, a pale dove grey washed with pink, and a faint metallic shimmer. I don't really know why I bought this, because it's not really "me," but it was perfect for this project, because it was plain enough for the thread to show. Lots of pictures to share in this post.
I started by tracing and stitching the square lines, using my walking foot and Aurifil 50:
Then, a different motif in each border area. I started as Patsy Thompson suggested, with the basic design that she called "worms" in the first half-inch border region:
In border #2 (also a half-inch), I stitched a basic swirl, again as she suggested in her tutorial:
 |
| Detail of first two half-inch borders |
The next border was a full inch. I decided to try my "whale tail" motif that I used in the
October challenge. I did a little paperwork to figure out how to turn the corners gracefully, and decided to add simple feathers:
 |
| Corner detail of third border |
In the next half-inch border, I went with Angela Walters' little square spirals that I practiced
in November. I still really like this particular motif, and it was easy to turn the corners:
 |
| Fourth border |
The next two were both two inches wide, and I wanted to try the feather wave border that was shown in the tutorial. I started by marking evenly distributed dots along the edges of the border region. I used those dots to eyeball the curves, which I did free-motion rather than switching to the walking foot:
 |
| A little uneven, but not enough to rip 'em out. |
With the curves in place, I went back in to add the feathers:
 |
| Fifth (two-inch) border of curved feathers. |
It took me a while to get the shapes right on these and some looked much better than others (which is the point of a learning experience, right?). The final border was to be a mirror image of the fifth. Again, I started with the basic curve:
...and then braced myself for the final pass, adding the last set of feathers:
 |
| I especially love the corner treatments on this design. |
Now that I am looking at this photo, I can't believe that I made this! These borders look absolutely amazing (which, as it happens, I do say so myself)!!! I know, because I made it, that they are far from technically perfect, but this wasn't done with an embroidery machine, or a pantograph, or even a stencil -- just completely eyeballed free-motion work -- so I'm quite pleased with the results! In fact, I deserve some more exclamation points: !!!!!
After the borders were done, I had to put something in the center. I love the spiraling square, so I switched over to my walking foot and started at one of the corners working my way in:
 |
| This is a snap to do on a small piece that is easy to pivot. |
And, behold, the finished piece:
After I finished this, I took my bobbin case apart to vacuum the lint out (I always do after a few hours of quilting) and found that the metallic sheen on the fabric was coating the guts of my machine. Yikes! It wasn't sticky, though, so it came right off. The next and final task for this wonderful challenge is to compile all twelve of my projects into a single collage. Tune in next time!
Peace,
AK


